

See it in motion.
The complete how-to guide.
Watch the clips above, then follow along here.
Prep first.
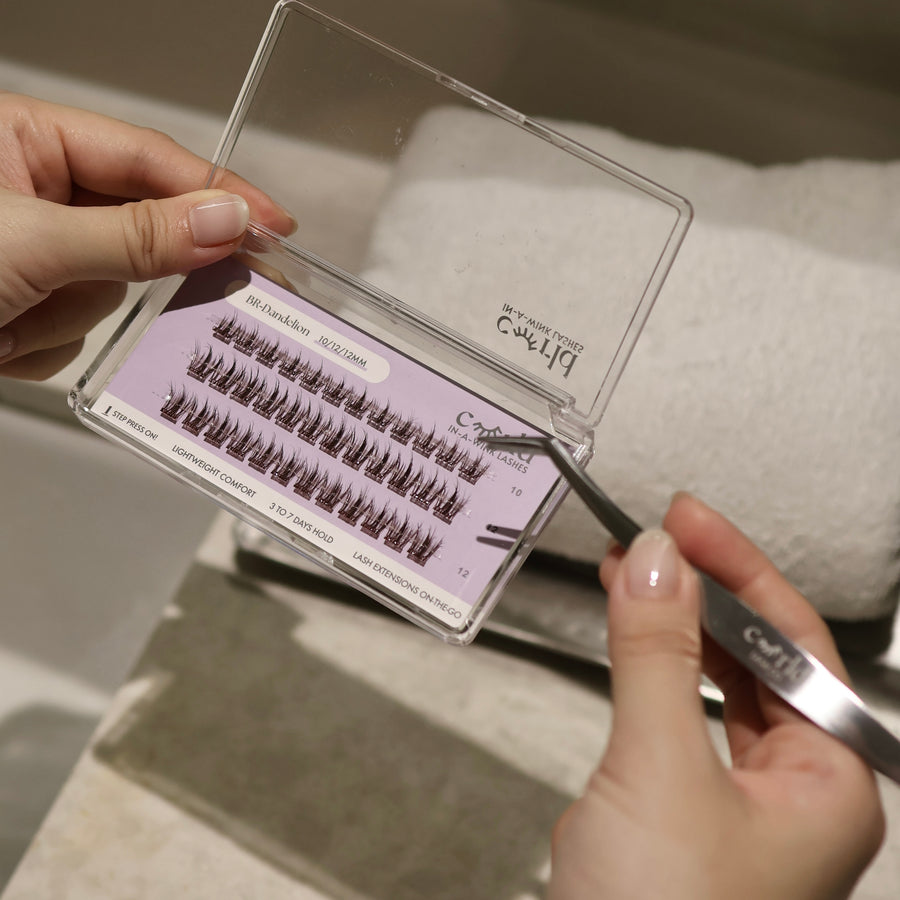
Oil, moisture, makeup or skincare left on the lash line prevents the adhesive from gripping securely.
Proper prep gives your lashes the best chance of lasting. Clean your eyelids and lashes thoroughly with an oil-free cleanser, then make sure the lash line is completely dry before application.
- Lash line fully clean and dry
- No skincare, makeup or oil around the eyes
- Apply before your skincare routine and makeup
- Optional: gently wipe under your lashes and lash line with a clean tissue before applying
Optional — curl first
For extra lift and a seamless blend, curl your natural lashes with an eyelash curler before applying.
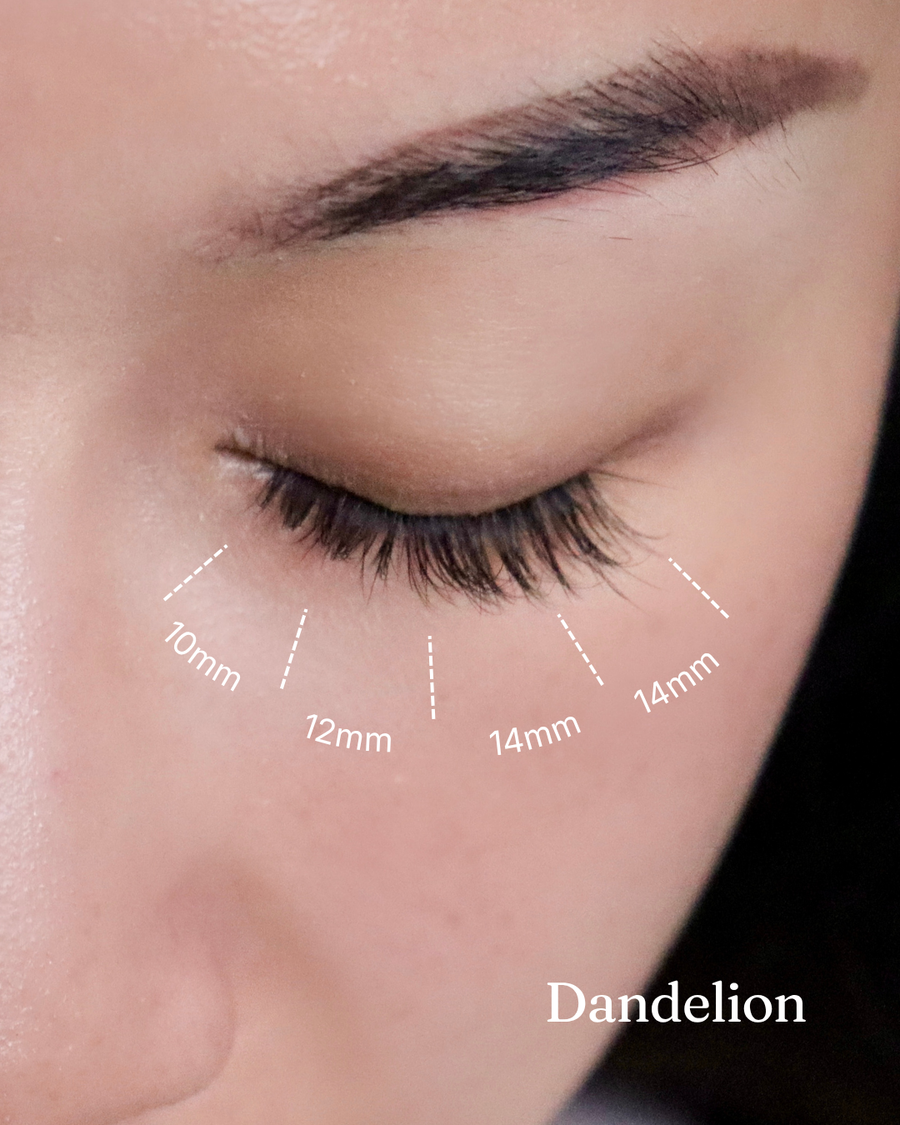
Lash mapping is deciding which length goes where to shape your final look. Clusters come in 10, 12 and 14mm lengths so you can customise to your eye.
Depending on your eye shape, length and desired look, figure out:
- How many clusters you need
- Which lengths you want to use
- Where each cluster will sit
Try these sample lash maps
Listed from inner to outer corner.
- Natural: 10, 10, 12, 12
- Cat eye: 10, 10, 12, 14 — gradually increasing in length toward the outer corner
- Open eye: 10, 12, 14, 12 — with the longest length placed near the centre
Adjust the number, placement and lengths to suit your own eyes and preferred look.
Step by step.
Our pre-glued clusters have the glue strip applied to the upper side of the lash band, while the underside is non-sticky. Handle each cluster carefully to avoid touching the glue strip or damaging the cluster.
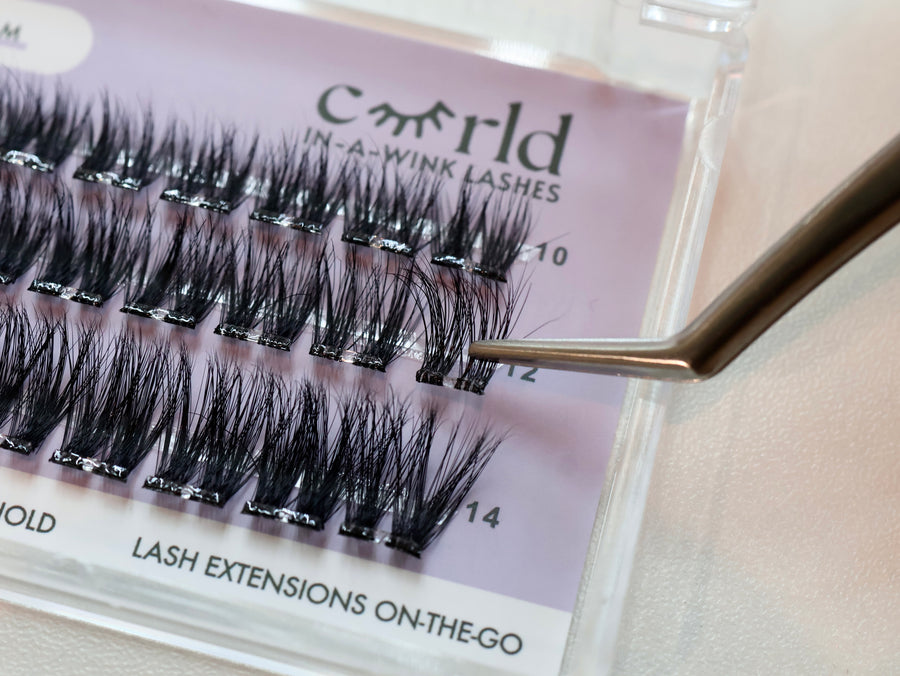
- Use angled, anti-stick tweezers with properly aligned tips.
- Make sure the tips are completely clean and free of glue residue, so the cluster does not stick to the tool or become damaged.
- Grip one section of the cluster firmly near the base with your tweezers.
- Avoid the glue strip, picking up from the lash tips, and clamping across the entire cluster.
- Hold firmly, then lift slowly, peeling away from the tray.
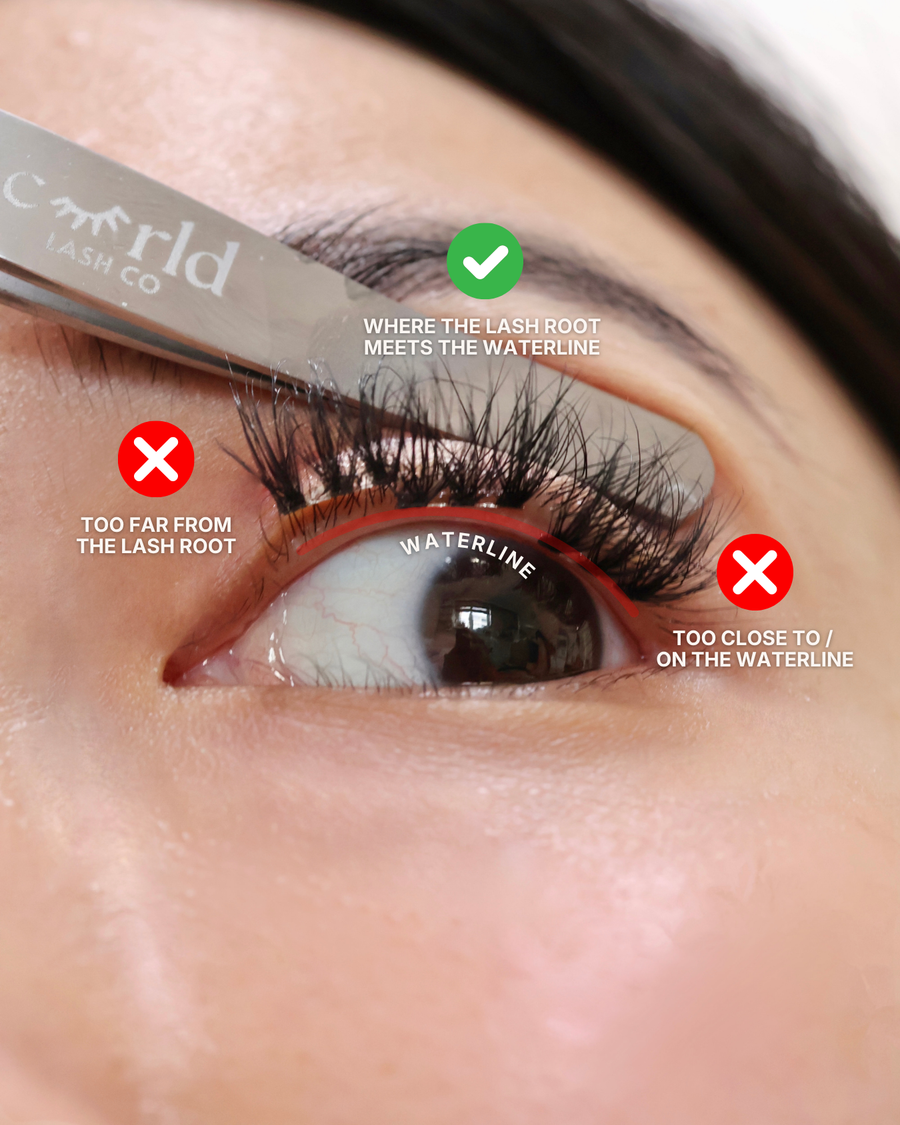
- Place the cluster under your natural lashes.
- Align the glue strip to your natural lash root, avoiding the waterline.
- Angle the cluster to follow your natural lashes, ensuring the glue strip makes full contact.
- Start at the outer corner and work inward.
Need to adjust it? Gently lift and reposition before pressing firmly. Limit adjustments, as repeated repositioning can weaken the glue strip.
How to check your placement
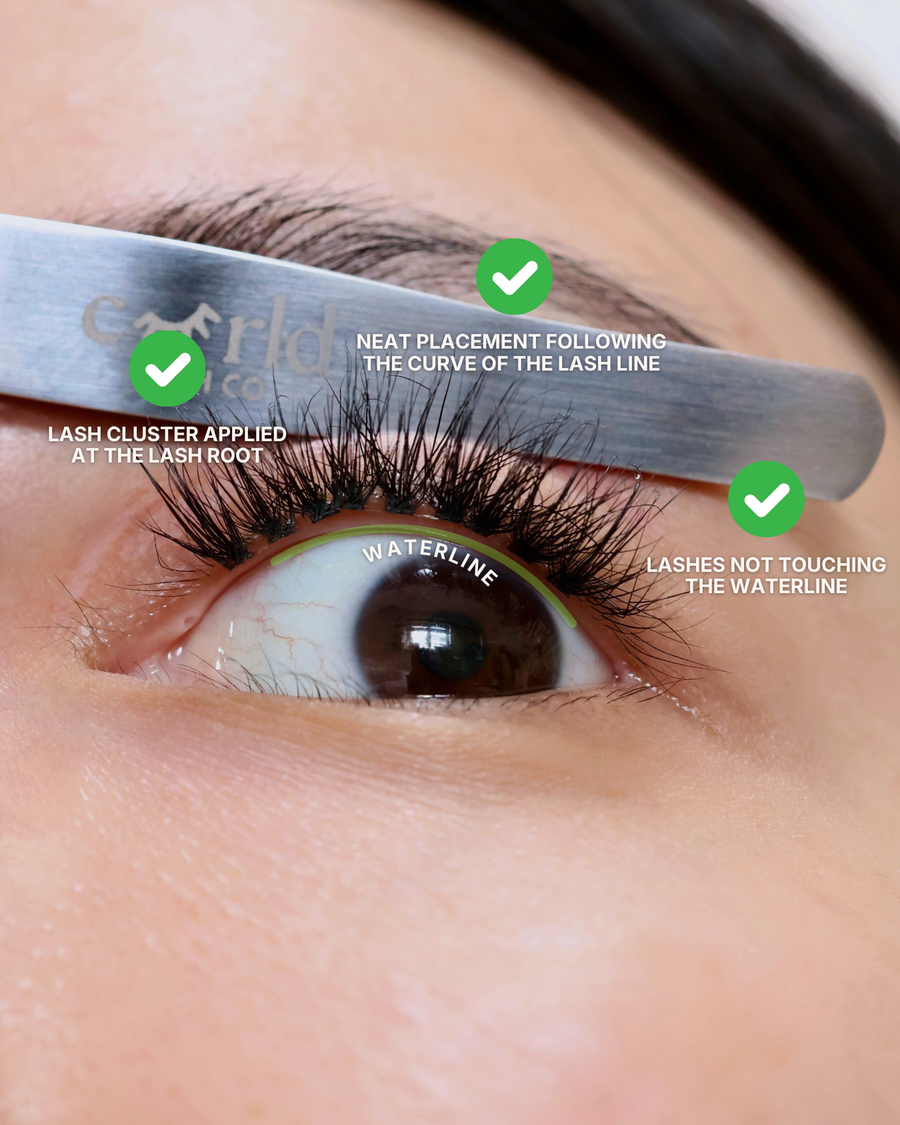
- No visible gaps between the cluster and your natural lashes
- Follows the curve of your lash line
- Sits comfortably away from the waterline
- Angles slightly upward with your natural lashes
- Feels lightweight, with no discomfort or tearing
Find the right placement
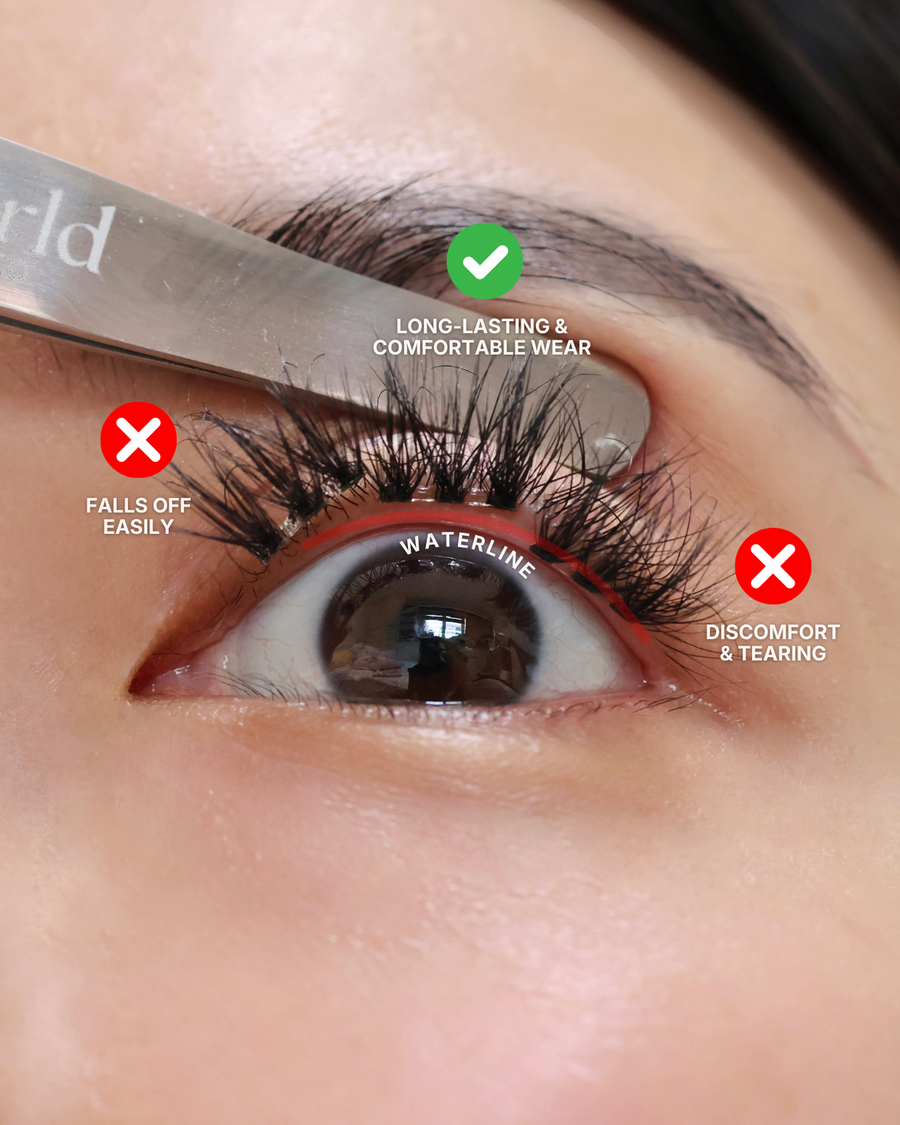
Too far from the natural lash root can leave a visible gap and cause early lifting. Too close — or directly on the waterline — may cause discomfort and tearing. Aim for the glue strip to sit under your natural lashes, aligned at the lash root without touching the waterline.
Why apply the clusters underneath?
It hides the band for a seamless finish, needs less precision than a top application, and fits every eye shape.
Applying beneath your natural lashes helps hide the band for a seamless finish, requires less precision than applying on top, and allows the placement to be customised to your eye shape.
Our adhesive is pressure-activated, so firm, even pressure along the band helps create a secure, long-lasting hold.
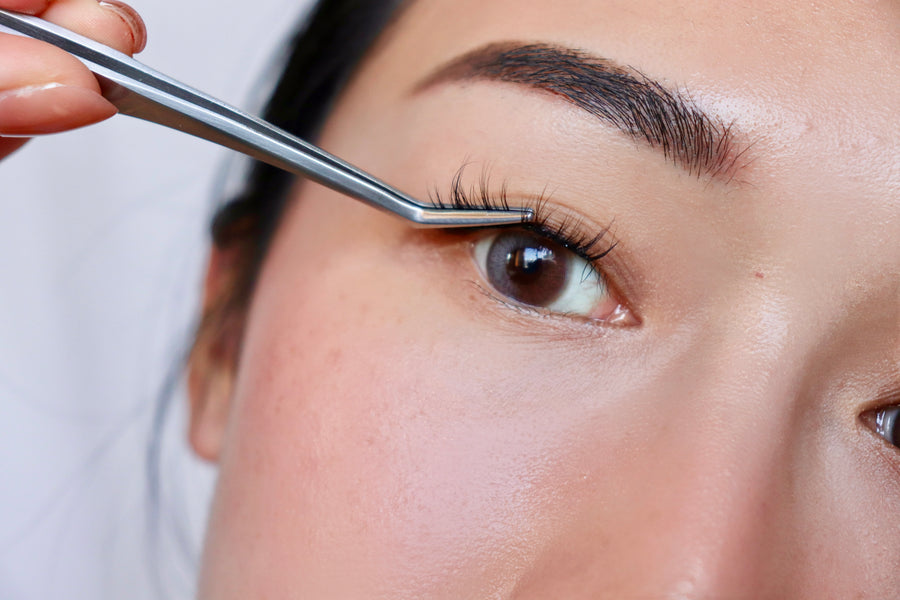
- Using your fingertip or tweezers, press firmly along the band so the glue strip bonds against your natural lashes.
- Hold for a few seconds, then release gently.
Avoid: Pressing only on the lash hairs or shifting the clusters after placement.
Care tips.
01Keep oils and creams away
Avoid oil-based cleansers, heavy creams and eye products directly around the glue strip, as they can break down the adhesive and weaken the bond.
02Be gentle around the eyes
Avoid rubbing, pulling or repeatedly touching the clusters. After showering or cleansing, gently pat the eye area dry.
03Shower and cleanse carefully
Showers and workouts are fine. Avoid prolonged direct hot water, strong steam and rubbing around the eyes.
For extended wear - wash the rest of your face as usual while avoiding the eye area. Then clean your eyelids separately using an oil-free micellar water on a cotton pad.
04Sleep with less friction
Sleeping on your back can reduce rubbing, but it is not required. Side sleepers should avoid pressing the lashes directly into the pillow to avoid shifting at the outer corners during sleep.
05When to replace your set
Our lashes are meant to be worn for 3–7 consecutive days, depending on your application, lifestyle and aftercare.
Remove them sooner if the band begins lifting, feels uncomfortable or becomes visibly soiled. For optimal hygiene and comfort, we recommend replacing your set after 7 days of wear.
06Sensitive skin or eyes?
Sensitivities vary. Our adhesive has been tested as suitable for sensitive skin. We recommend doing a patch test before your first full application, especially if you have sensitive skin or eyes.
Stop use and remove the lashes if you experience irritation or discomfort.
How to remove.
- Saturate a cotton pad with an oil-based makeup remover and hold it over the lashes until the bond begins to soften.
- Gently slide the clusters away from the base. The clusters and softened glue should come away easily.
- Once it has been removed, cleanse your natural lashes and eye area to remove any remaining oil.
Still secure or have glue residue?
If the clusters still feel secure or any glue residue remains, apply more oil-based remover and wait longer.
Troubleshooting.
A cluster is crooked
Gently remove and reposition it before pressing firmly. Once correctly placed, press along the glue strip and hold for a few seconds to secure.
Avoid repositioning it repeatedly, as this may weaken the adhesive.
It feels pokey or heavy
The cluster may be too close to the waterline, too near the inner corner, angled incorrectly or overlapping too much.
Remove and reposition it slightly farther from the waterline. When placed correctly, the lashes should feel lightweight and comfortable — not pokey, pulling or painful.
It feels sticky when I blink
A slightly tacky feeling can be normal with newly applied lashes. It may be more noticeable in sparser styles or where there are small gaps between the lash fibres, as more of the glue strip is exposed.
The tackiness should gradually reduce after a few days. You can also lightly tap the underside of the clusters with a clean fingertip to help the exposed glue strip feel more matte.
If the lashes feel uncomfortable, pokey or are sticking to your lower lashes, check that they are positioned correctly and not touching the waterline.
A cluster lifted after a few hours
Early lifting, especially at the inner or outer corners, may be caused by:
- Oil, moisture, makeup or skincare before application
- Placement too far from the lash line
- Incomplete pressing during application
- Oily skin or skincare products around the eyes
- Makeup removers or products containing oil
- Rubbing, touching or sleeping directly against the lashes
My lashes move around after I apply them
With proper application, the clusters should not move immediately after placement. Movement usually means there is oil or moisture along the lash line, or the cluster has not been pressed securely.
Gently wipe along the lash line again with a clean tissue and allow it to dry fully. Reapply the cluster, then press along the glue strip and hold for a few seconds to secure.
The cluster sticks to my tweezers
Make sure your tweezer tips are clean and free of adhesive residue. Grip only part of the cluster at the base, avoiding the glue strip, then lift slowly up and away from the tray.
If it still sticks, check that your tweezers are properly aligned and anti-stick.